Thomas Keller Oreos (TKOs)
I’ve seen a lot of recipes for oreos over the past year or so, as it has become increasingly trendy to make classic American treats at home (twinkies, hostess cupcakes, oreos, ketchup, etc). I usually pass them by, thinking that while homemade hostess cupcakes are great, nothing could be better than storebought, mass-produced Oreos. There’s something about the balance that storebought Oreos achieve that remains elusive in so many homemade recipes, and from the recipe below, I think it comes down to texture and salt. The recipe in this post comes as close as possible to replicating the salty cookie, sweet filling balance, and the chocolate cookie has a sandy texture that is similar to that of storebought Oreos. This being a recipe developed by Thomas Keller, I found in my tests that there was no need to fiddle with its proportions. I have, however, rewritten the instructions in a lot more detail, to provide more guidance on how the dough behaves. You can make these cookies with a hand mixer or stand mixer, but it is much, much easier in a food processor. Making them with a hand mixer will take you about 20 minutes of mixing to get the dough to wet crumbs, at which point it can be mooshed into a disk of dough.
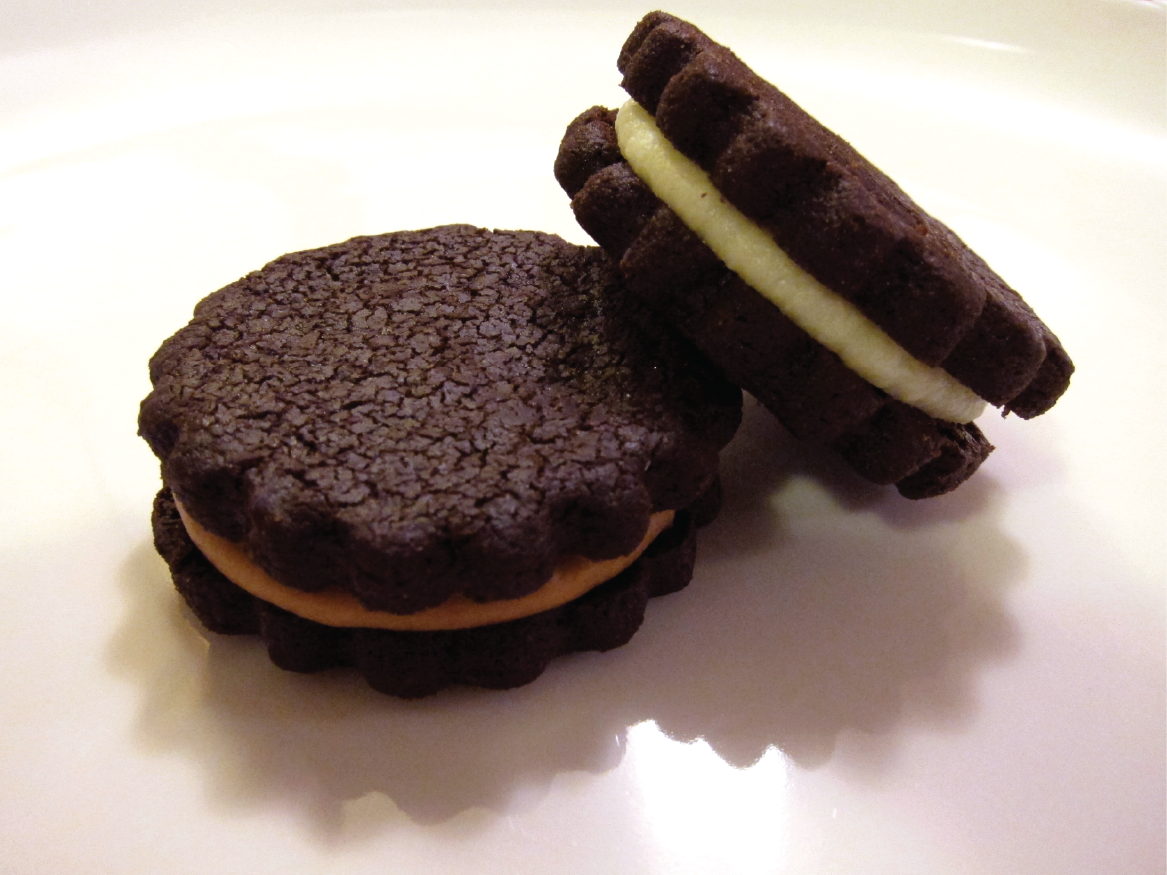
When I included these cookies in this year’s xmas cookie boxes, I was looking for a dark chocolate wafer. Typically I would use my go-to Alice Medrich chocolate wafer recipe that I use for icebox cakes, but I wanted something here that looked a bit fancier, so I used just the cookie part of the TKO recipe, without the filling. I had scads of leftover cookies, so I decided to test the filling – my first impression was that the white chocolate ganache would overwhelm the chocolate cookie. I also didn’t know how much moisture the cookie would absorb from the ganache, and I generally pick cookies for the boxes that I know will go stale very slowly. I can now happily tell you – and I believe my co-workers would agree – that the filling is definitely a good idea, and that the cookies more than stand up to it for at least a week. Further than a week, I don’t know, because the cookies were long gone by then. The cookies do absorb a little bit of moisture from the filling – just enough so that the cookie sticks together and doesn’t fall apart when you bite into it – but they remain crisp overall.
These cookies are also spectacular with a peanut butter filling, made in this case as a peanut butter ganache (peanut butter chips and cream). Both the peanut butter filling and the white chocolate ganache filling that comes with the original recipe are quite sweet, but contrast well with the salty-sweet chocolate cookie. The cookies are also plenty dark from a good helping of cocoa – the darker the cocoa you use, the darker these cookies will be (I used my regular Valrhona cocoa). And of course, you could always make these cookies without any filling – they’re no less an excellent cookie for losing the ganache.
Thomas Keller’s Oreos
for the cookies:
1½c plus 3T flour
¾c sugar
¾c cocoa
1½t salt
½t baking soda
15T butter, preferably at room temperature
for the filling:
½c heavy cream
8 oz white chocolate chips or 10 oz peanut butter chips
1. To make the cookies, combine the flour, sugar, cocoa, salt, and baking soda in the bowl of your food processor. Pulse a few times, until thoroughly mixed together. Cut the butter into half-inch chunks (I cut slices off the stick and quarter them), then pulse until the dough clumps. During the first few pulses, your dough will still look like pale brown sand. A few more pulses will get your dough looking like darker sand. A few more pulses after that, your dough will just barely begin to clump. It’s ready when it clumps in large pieces and there aren’t too many loose sandy bits of dough. The dough will be mixed better on the bottom and a little more sandy on top – this is fine.
2. Flatten the dough into a disk and wrap in plastic. I find that the easiest thing to do is overlap two pieces of plastic wrap, put the dough on that, wrap it up in the size disk I want, then flatten to the confines of the plastic wrap. Chill the dough for at least an hour, or overnight – if you chill it overnight, it’s easiest to roll out the dough if you let it soften a little bit.
3. Preheat the oven to 350F. Roll the dough to a scant 1/4″ thick and cut out the cookies with your desired cookie cutter (I’ve done 1.5″ hearts and 2″ fluted circles, both of which worked fine). The dough, when it’s rolled out, should look almost like dark chocolate fondant – smooth and pliable. If it’s too soft to cut the cookies, chill the rolled dough in the freezer for 10-15 minutes. Place the cookies on a baking sheet, at least 1″ apart – the cookies do get a little bit bigger (I fit 35 hearts and 24 circles per baking sheet, for reference). Bake 12-15 minutes; the cookies will puff, then deflate (much like the Alice Medrich chocolate wafer recipe). You can minimize the cookies’ spreading and help them keep a sharper edge by popping the baking sheet with the cut cookies on it in the freezer for 10 minutes. I generally use 3 cookie sheets and rotate them through the oven, cooling rack, and freezer. If you have good cookie sheets, going from freezer to oven won’t warp them. Anyway, after the cookies come out of the oven, let them cool for about 5 minutes on the pan, then transfer to cooling racks. I re-rolled the scraps until I had only enough dough left for one cookie, with no ill effects in texture.
4. To make the filling, bring the cream to a boil in a small saucepan. Place the chocolate (or peanut butter chips) in a heatproof bowl and pour the cream over the chocolate. Stir with a spatula to combine, then let cool until it’s just slightly pourable. You can stir the ganache to get it to cool faster, but this takes a while, even in the winter (and especially if you are doing a double batch). In my experience, it has taken at least an hour – stir it occasionally, so it cools evenly.
5. When the ganache is ready, transfer it to a ziplock bag, squeezing out excess air. Snip a corner of the bag off (start small!) and pipe the filling onto the cookies, sandwiching them as you go. It helps expedite if you match up the cookies to same-sized mates (if you’re like me and you roll out the dough by feel, you will end up with some variability in cookie size). For the 2″ fluted rounds, I used about a 1/2T of the white chocolate ganache, and 1.25t of the peanut butter ganache per cookie. Let the ganache set and then store in an airtight container. These will stay good for at least one week, and probably two. If you fill them with white chocolate ganache, they need at least a night for the flavors to meld (really – these tasted way better the next day). The peanut butter ones are good to go right after they’re filled.
[makes 40-45 2″ sandwich cookies or 150 1.25″ non-sandwich cookies]
Update 01-28-2013: These cookies stay good for 3 weeks. If you’ve filled them with white chocolate ganache, the cookies will get a little soft as the chocolate cookie absorbs moisture from the ganache; then the cookies will lose moisture again as they go stale. If you’ve filled them with peanut butter ganache, the cookies will stay crisp throughout (I assume they stay good for as long as the white chocolate ganache version, but I don’t actually know for sure, since these cookies got snapped up pretty fast!)